How to export fundus photos in Optovue Solix.
1. When the fundus test has completed, a summary/editing screen appears.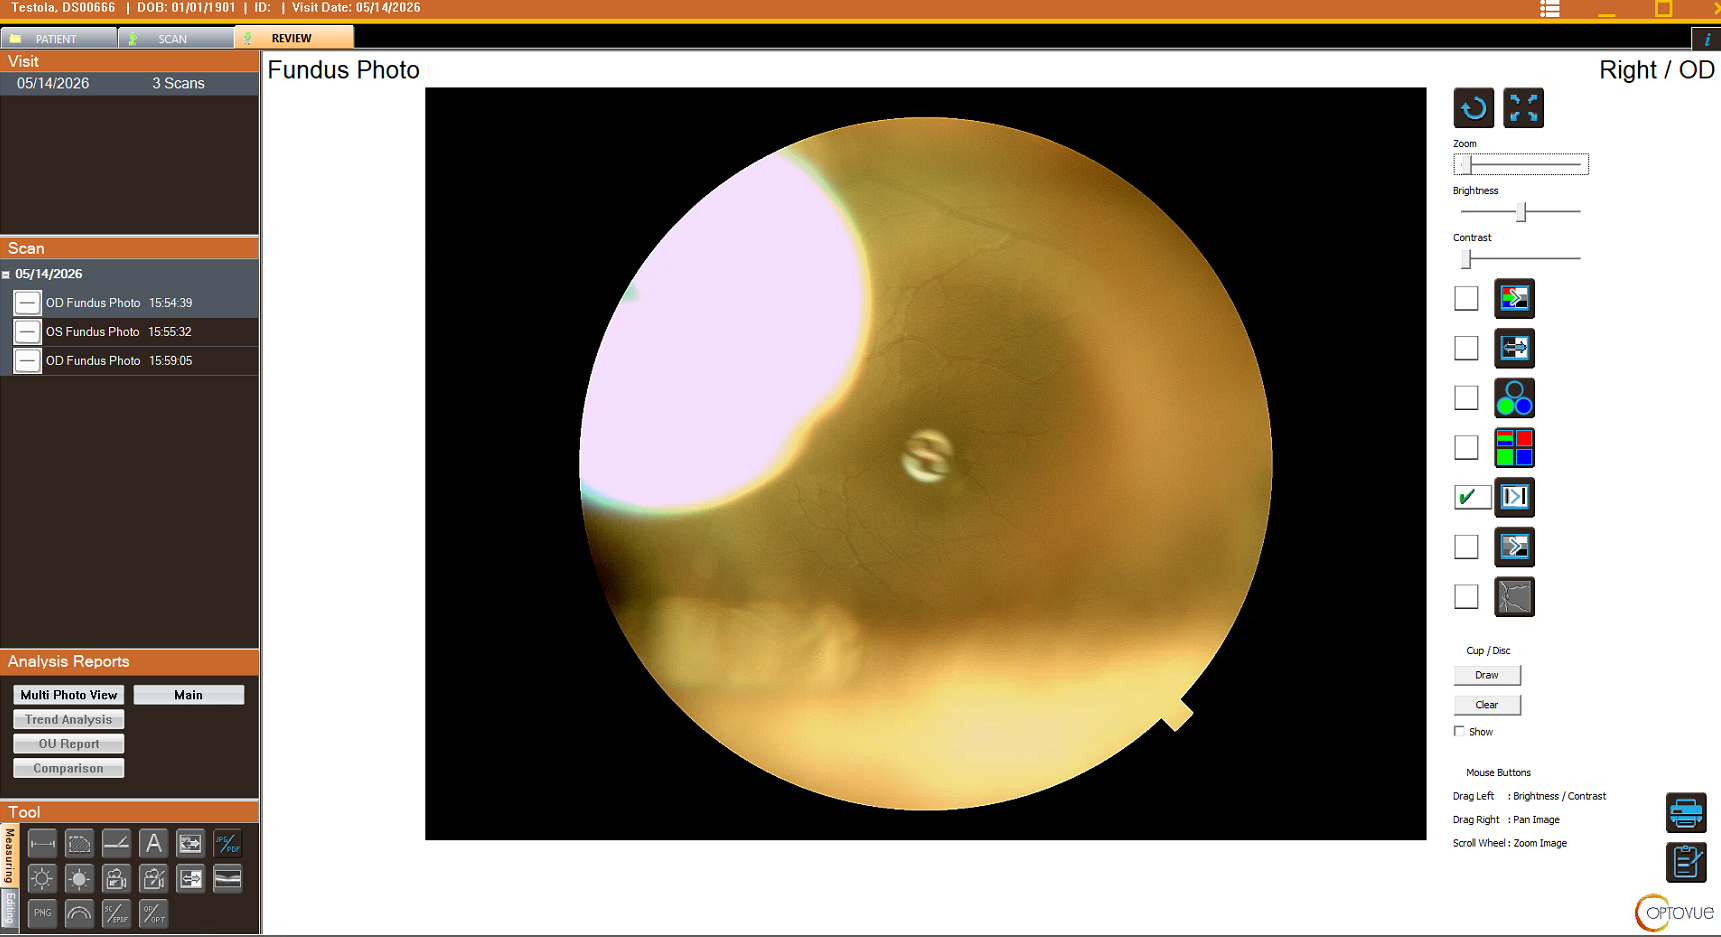
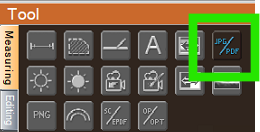
2. Under the Tool heading, select the JPG/PDF icon.
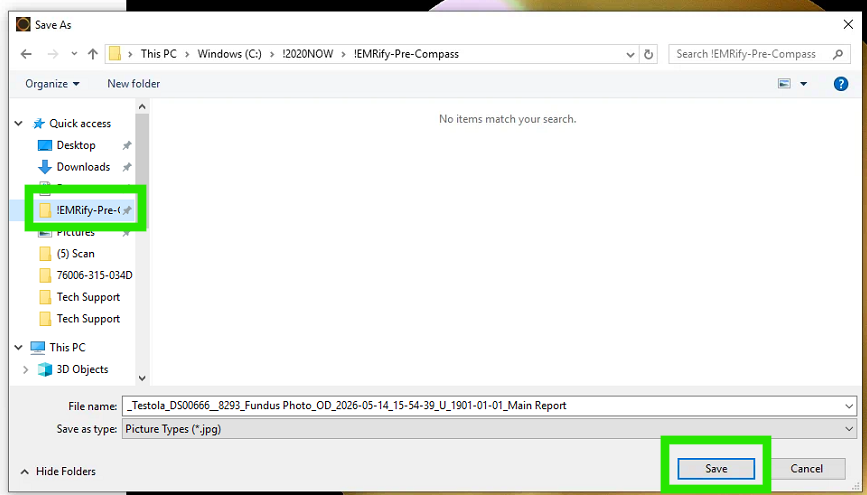
3. Select the !EMRify folder (it may be selected already, but it's always a good idea to check) and press Save.
4. If you have multiple photos, choose the next one in the list by highlighting it under the Scan heading.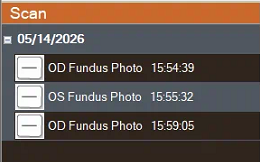
5. Repeat steps 2 and 3 for all remaining photos.
6. Switch to EMR, and import the photos into the chart the standard way.
If you have any questions you can email ITSupport@for2020now.com
Article Updated on 05/20/2026

Note: This document and any attached materials (or program, etc.) are confidential and proprietary and constitute the sole property of 20/20 Vision Center, LLC and 20/20NOW Eye Exams, PC.. This document and any attached materials (or program, etc.) are intended solely for the recipient and no portion thereof may be reproduced, forwarded, distributed, or otherwise disclosed in any manner to any third party without the express prior written consent of 20/20 Vision Center, LLC and 20/20NOW Eye Exams, PC. © 2017 by 20/20 Vision Center, LLC. All rights reserved.
Was this article helpful?
That’s Great!
Thank you for your feedback
Sorry! We couldn't be helpful
Thank you for your feedback
Feedback sent
We appreciate your effort and will try to fix the article